I recommend everyone to start building a fanless computer with the search of an appropriate heatsink. It would be a good thing if you'll be able to find a ready made sink of the appropriate size, but If you won't - you can use my method. The poor state of russian native industry is not a secret for anyone. I had searched the Internet for a long time, spent a number of days off at radio markets looking for a good heatsink for my fanless computer. But I found NOTHING. The sinks found by my friends hadn't quite met my requirements. I didn’t want to mod my case heavily or even build a new one from scratch as they did. I was satisfied with my stock InWin. Probably I was too lazy…As a result I decided to fabricate a heatsink on my own. The cost turned out to be very low and the quality of the home-made heatsink was quite acceptable. A good passive sink requires a thick base, so you'll need a smooth-faced aluminium plate at least 8 mm thick. The optimal thickness is 10-12 mm, this guarantees even heat distribution over the whole dissipation area. Don’t try to use alu sheets thinner than 8 mm as a base - you'll be disappointed, we've already tried this…

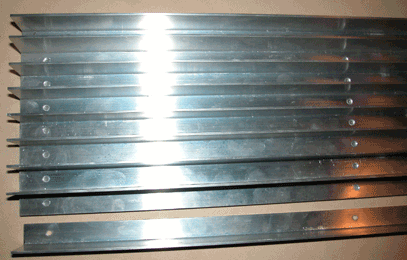
What we need is: an aluminum plate of required size and thickness; a rivet gun with 3.5 mm rivets ; 120 g tube of thermal paste; aluminium angle bars and a free Saturday. I can’t tell you where you can get a piece of aluminium plate, I already had one. Scrap yards, flea markets... The angle bars were found in a hardware store: 32*19 mm, 2 meters long, 5$ apiece. I bought four.

For a heatsink base I used these ugly plates that came from from a mounting mechanism of some old instrument group. Despite all these holes and the thickness of only 8mm, the resulting sinks proved to have a decent cooling capacity. The looks was also good. I used two such plates with riveted angle bars for my fanless computer. The resulting size of each heatsink was 40*15 cm. I had to make two because I didn’t have one solid plate of an appropriate size.
At first cut the angle bars to get fragments of required length. Bevel them with a file not to get your hands scratched afterwards and to improve the appearance of the heatsink. Don’t be lazy and buy a small miter box to guarantee a proper angle of cutting. When you assemble all the angle bars into a heatsink the slightest irregularity of the cuts will be prominently visible, trust me.

Be accurate when marking. It’s more convenient to saw not one by one but all four angle bars together having tightened them with a cramping frame (use gaskets not to scratch metal).

Then mark and drill holes in the angle bars. Bevel both sides of each hole by means of a drill of big diameter as shown in the picture. If you don’t do this the buildups of metal and rough edges will prevent angle bars from tight contact with radiator base. As a result there will be no good cooling. Be attentive when carrying out this stage of the modding. Slapdash work is inadmissible when constructing fanless computer, because we fight for each degree. When I’ll construct next modded computer of such type (I’m planning to do it soon) I’ll regrind each angle bar to the stand as well, this will not take too much time…

